Church was cancelled due to icy roads, so I got an extra sculpting session in today. I worked on another model first and had some stiffer, but still workable epoxy left so I made a pair of ears for Rebel to replace the Breyer factory ones. I find it easier to sculpt them from scratch than reshaping Breyer ones. Using stiffer epoxy works well for making ears. There is a little bit of extra epoxy on the end to hold them to the tin foil that I'll snip or dremel off. Then I'll attach them with fresh epoxy and smooth them into the head. That will come later. I'm using the existing ears as a finger hold while I push epoxy around on the neck. Once the epoxy gets beyond a certain stage and is too stiff to work, I ball it into small balls and make road apples!

I opted to start with a big bunch of fresh epoxy in hopes I could do the rest of the neck all at once. It is so much easier to blend epoxy into fresh epoxy than cured epoxy. I like using Magic Sculpt and start by forming 2 equally sized balls of each part and then blend well together using my (gloved) hands. I highly recommend buying a box of cheap (penny apiece) gloves. I go through these quickly, but it helps limit my exposure to the epoxy as I really have to work the epoxy to get it fully blended.
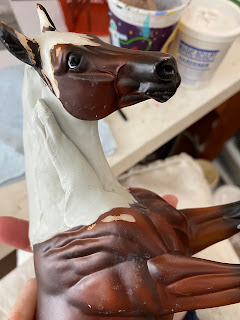
I started by adding more epoxy to the bottom of the neck, as it needed to be fuller and straighter. This also allowed me to blend it up under the head and around the cheeks as well. The next picture shows the following piece of epoxy that I added to fill in the brachiocephalic muscle (I had to look that up!) The muscle goes from the shoulder to the atlas, so is really formative in getting a properly shaped neck.
I blended it into the existing areas.
I was too eager and starting sculpting detail where the bottom of the neck meets the head, all of which had to be redone multiple times and got too wet from smoothing. It's generally better to get it right once and leave it alone. Every time I add water to smooth, it breaks down the epoxy more and more.
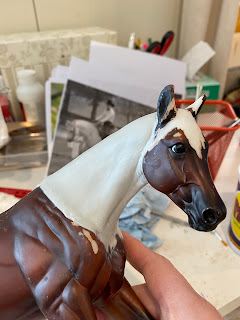
I then moved on to adding epoxy to the upper half of the neck.
You can see the epoxy is already getting harder as it is not as pliable going on.
And blended that in.
Using my thumb, I push the epoxy around to try to shape the various muscles in the neck.
It's important to use reference photos of the neck in the position and movement you are recreating.
I tried to work on both sides of the neck, but the epoxy was setting up too quickly.
The bottom I had done at the same time for both sides, so it blended in okay.
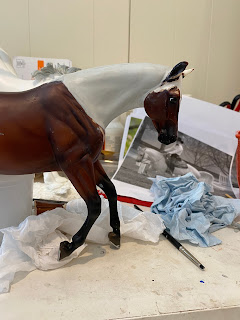
I started trying to do the front of the upper half, but you can see the back half of the upper part on this side is a hot mess. The existing base underneath is really too close to the surface of where I want my final result to be, and adding an epoxy later will make it too thick, so I'll just dremel it down more and put a fresh layer on top after this is all fully cured.
Fiddled around with the wrinkles underneath and some more details, but they might need a quick hit of the dremel and fresh epoxy as well. I overworked the epoxy, so it's crusty looking with little bits of epoxy and doesn't have the fullness that you can get with fresh epoxy.
Once this is cured, I'll take a look with a critical eye and see what may need to change. Necks are hard and getting the planes right is tricky with epoxy (for me). I find non-hardening clay a little easier for this because you're not rushing against the curing time.


What will the mane look like? :D I love the progress so far!
ReplyDeleteHopefully several interchangeable ones!
DeleteI am very interested to see you do them!
DeleteI am really enjoying this series, Danielle!
ReplyDeleteI'm with Lynn: this is fascinating. I'm looking forward to the ears! Best of luck!
ReplyDelete