 |
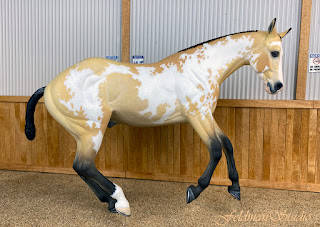
| Rebel Just for Kicks |
As I've been posting the creation of Rebel Just for Kicks, I noticed that I was often crediting someone for a tip or bit of inspiration. While it's important to give credit where credit is due, it wasn't lost on me that my artistic journey has been supported and influenced by many, many people along the way. I would not be the artist I am today, or the artist I hope to become tomorrow, without so many people sharing, inspiring, and lifting me (and so many others). There are many, many people on my journey that I am grateful for, but at the risk of leaving people out, I'd like to highlight those that came to mind as I worked on this piece.
Back in high school, my art teacher and fellow equine lover, Carolyn Freese, taught me to really see things. I will be forever grateful that she fostered my love of art.
Sommer Prosser sculpted the Breyer model Harlee D Zip that is the foundation of this project. Such a lovely canvas requiring very little in the way of must-make corrections to get him show ready. Most of the customizing was done to make him more performance friendly, or to try to add a touch more realism where mass production made him less so.
The person that introduced the use of soda glue was Sarah Rose. Many years ago she posted an article on fixing Khan's ear (one of her iconic resins), and it was a game-changer. I don't think I could customize without soda glue!
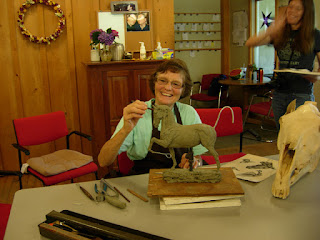 |
| Kathleen Friedenberg |
I have been blessed with the opportunity to attend a handful of sculpting workshops. One was an AAEA sculpting clinic with Kathleen Friedenberg just before I moved away from PA (I delayed my move so I could attend!). I still use her approach to starting a sculpture, and I'm sure many other fine points I may not even realize.
I also had a one-on-one sculpting session with Morgen Kilbourn to work on Panache (who will get done someday...) This session, along with helpful videos she posted, helped me to see better how the neck functions. I am not perfect at it, but I do feel I am getting better at sculpting necks, which came in handy since Rebel has an all-new neck for his performance-friendly headset.
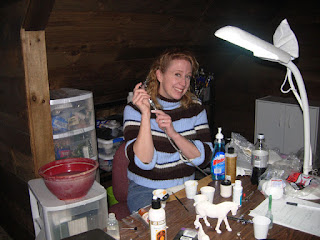 |
| Tiffany Purdy |
The idea for magnetized and interchangeable manes and tails was inspired by my friend Tiffany Purdy. She is also the one who introduced me to airbrushing (and threatened to take away my airbrush if I ever made round, unrealistic, airbrushed dapples, lol)! The work on her NaMoPaiMo horse and in-progress photos pushed me to try to do a little more shading and color layering than I normally attempt with the airbrush. I admit I am not comfortable using the airbrush for much more than putting on a basecoat.
The idea to build up support under the interchangeable manes before sculpting them so that it is easier to take them on and off came from Kylee Park's Breyerfest class during the 2020 virtual BF.
Jenn Danza is a pioneer in using pastels on models. I had only used them as sticks directly on paper, so the idea of grinding them down and sealing them on a model was revolutionary for me. The majority of my work has been made with pastels and acrylic paint over the years (but thanks to Heather Bullach's oil painting workshops, I am branching out!)
I would be remiss not to recognize Leslie Kathman for her sharing of color genetics, the application of it for artists, and a bazillion beautiful reference pictures. One of many tips I've taken from her came from one of her Breyerfest workshops. She demonstrated how the stifle is generally one of the darker areas and now I can't unsee it! Not to mention I am getting better at seeing and replicating realistic patterns.
The introduction of Liquitex High Flow Acrylics for white markings is all credit to Mel Miller. She is always experimenting with new products and techniques and sharing her wealth of knowledge with the model horse community. This year she and Kenzie Williamson introduced the use of a white paint pen. Genius! (You simply must try it!)
Sarah Minkiewicz needs no introduction, a longtime pioneer of model horse artistry and generous with her knowledge. Along with oodles of good things along the way, one tool I picked up from her recommendations is the Prospek caliper tools. I use these for measuring proportions during sculpting, and they handily made an impromptu stand for Rebel!
The impetus to record Rebel's progress here on the blog goes to the following bloggers, whose blog posts continue to be a wonderful connection to the hobby on any given day. And not only do they blog, but they take the time to post comments on my blog, which is always much appreciated. Thanks to (in alphabetical order) Sue Bensema, Jennifer Buxton, Anne Field, and Lynn Isenbarger! Seriously ladies, thank you for putting your blog posts out there day after day. Blogging is a lot of work!
Thanks to Mares in Black, Jackie Arns-Rossi and Heather Malone, for giving a shout-out to my Rebel in the Making blog posts. It is always a lovely surprise to get a mention. The MIB podcast has been a solid connection to the hobby, shares inspirational artwork of others, and is always a great listen when I'm working on horses "in the zone".
Last, but not least, I want to thank the NaMoPaiMo community (and especially the founder and champion of NaMoPaiMo, Jennifer Buxton) for the sharing of progress pictures, triumphs, fails, inspirations, tips, and general encouragement. Without this, I would have thrown in the towel at many points in the process.
Thank you!


