Showing posts with label article. Show all posts

August 5, 2011

Top Ten Ways to Overcome Artist’s Block

Top Ten Ways to Overcome Artist’s Block

By Danielle S. Feldman

All artists experience artist’s block at some point. The following are some suggestions to get you creating again.

1. Try a new tool or mix some new colors

Ordering some new tools or new colors always gets me excited to try them out. See my article on the “Top Ten Not-so-obvious Must-have Very-affordable Tools for the Artist” to give you some ideas. Experiment with new colors. Try mixing non-horse-like, complimentary colors for some rich tones. Play around with the color palette and let loose a little.

2. Clean up your workspace

An organized and clean workspace can motivate productivity, whereas a dirty and messy one can stifle creativity. Take some time out to organize. Invest in some see-through bins to store your supplies, Try hanging up some peg-board to tack up your reference material. You may find you go through several organizational revisions to create a space that really works for you.

Our tiny, two bedroom apartment didn't stop me.
A card table doubled as a kitchen table and a workspace.

Even a tiny space can be organized. I use different containers to separate my pastel brushes from my acrylic painting brushes and my oil painting brushes. I have clear bins to seperate prepping items, sculpting items, and finishing work items. A crate holds my bottled acrylics and different art containers hold my tube acrylics, my pastels and my oils. It’s a little dusty, but everything is within reach.

3. Take a nature walk, Exercise, Stretch

Look to nature for inspiration; take a nice relaxing walk. Or get some exercise in and a good stretch. Releasing endorphins will boost your mood and get you energized. Sometimes just being outside will clear my mind enough to see through to the solution of an artistic dilemma. Other times, fresh ideas may abound.

4. Browse the galleries of your favorite artists, Read some of that reference material that’s piling up

Sometimes I like to browse the galleries of my favorite artists for inspiration. Not too copy their work, but to learn from it. Look through the stacks of magazines for real horses that might inspire you. Or sit down and read some of the reference material you’ve picked up, but not found time to read. That will keep you productive, even if you’re struggling to feel creative. You can find a comprehensive list of reading material in Sarah Minkiewicz-Breunig’s Reference Library Listing, published here, courtesy of the Model Horse Gallery. Sarah posted some highlights on her blog, starting with this one and then continuing to newer blog posts.

Link

If you’re like me, you have an accumulating pile of reference material waiting to be read that can spawn creativity or improve your understanding of the equine subject.

5. Make something with the purpose of destroying it when you’re done

It is so hard to let go and just create with no end purpose in mind. Time is such a valuable asset that every working moment is reserved for finishing up models. Don’t let this trap stifle your creativity. Take some time and make something with the plan to strip it or squash it when you’re done. Chances are you’ll take some risks along the way and maybe discover some new techniques. At the very least, the pressure to be perfect is gone and that alone might topple the crippling artist’s block.

Head Study, Status: Destroyed!
(helps that it started oozing brown stuff from a reaction between the wires and clay)

6. Turn on the tunes, or maybe a movie

If you don’t usually work to music, give it a try. Or if your favorite tunes aren’t doing it, try a movie instead. Pride and Prejudice is my favorite when I have a good long block of time to work. It makes the time go by faster. I don’t really watch it, as much as listen to it, so I wouldn’t recommend trying to paint while watching that new movie you’ve been waiting to see. Better to choose an old favorite.

7. Reward yourself

It works with my 4 year old! Make a rewards system for yourself. If stickers won’t do it, try a chocolate bar when you finish a really good session. Or maybe a Starburst if you can just finish up the eyes on that model that just doesn’t want to get finished. If you’re not food motivated (or like me, are trying to be good), try putting a dollar in a jar for every horse in your back log that you finish to buy yourself that special something. Whatever motivates you.

8. Do a project for yourself

It may seem like a guilty pleasure, but if you’re so overwhelmed with creating for customers that you’ve lost interest and maybe even quality, then it may be time to do a little something for yourself. Taking the time to be true to your own vision may revitalize your work, which then benefits your customers. It’s hard to do, but taking a break from commissions may actually turn out to be the right thing for everyone.

9. Work in a different medium or technique

If you always airbrush, try your hand at pastels. If you always pastel, try working on a sculpture instead. Just try something different. Even kneading a loaf of bread can be therapeutic. Some different ideas include flatwork in pencil, charcoal, pastel, oils, watercolor, oil pastels, or try making a collage, sculpting with play doh or sculpey in fun colors, making holiday crafts, wood working, scrap booking, sewing, crocheting - the skies the limit… Creating outside of your normal venue can be so refreshing! If you're looking for some help on trying out pastel technique, I know just the thing.

10. Set a block of time aside, sit down, and push your way through it

If all else fails, sometimes you just have to push through. Sometimes the very act of doing will get you going. This has worked for me on more than one occasion. If you find your not getting results instantly, start with a practice body until you find your flow. The point is to persevere. Good luck!

February 13, 2011

Top Ten Pitfalls for an Artist

By Danielle S. Feldman

The following are some pitfalls that an artist can fall into that can easily be avoided. All suggestions are based on my own experience, but will hopefully work for you as well.

1) Unrealistic Epoxy Clumps in Hair Texture

Stroke on rubbing alcohol (for Martin Carbone gapaxio) or water (for Aves apoxie sculpt) with a soft paintbrush after you’re done sculpting to smooth out those little clumps left from your sculpting tools before the epoxy cures. I’ve heard you can use Goo Gone to remove clumps from non-hardening clay, but have yet to try it myself.

Example of clumps in a tail that should be smoothed out.


2) Seam Lines in the Mane

Use the Rio Rondo carbide scraper with a pointed tip to recreate hair texture, following the direction of the hair, all along the crest of the mane to remove the seams as you go. Look up and down the mane from different directions to make sure no seam lines remain.

Seam lines that were missed during the prepping process

3) Wobbly Horses

If it’s a minor wobble, taking an emery board across the bottom of the longest leg to level out the hooves will work. You may find you need to build up the bottom or edge of a hoof on a short leg with epoxy. If you find a warped leg is causing the trouble then gently heating the warped area and moving it gently back into place to cool may solve the problem. And if all else fails, you can always make a base, using epoxy around shaped aluminum foil.

4) Air beneath standing hooves

A floating leg is just not realistic. If you see just a little air underneath a standing hoof, you may be able to sand the other, longer hooves with an emery board to even things out. But, the best bet is to add epoxy to the underside of the floating hoof. Make sure to apply a little epoxy over the edges, so that when sanding flush (with an emery board), you don’t end up with rounded toes.

5) Unrealistic Dapples

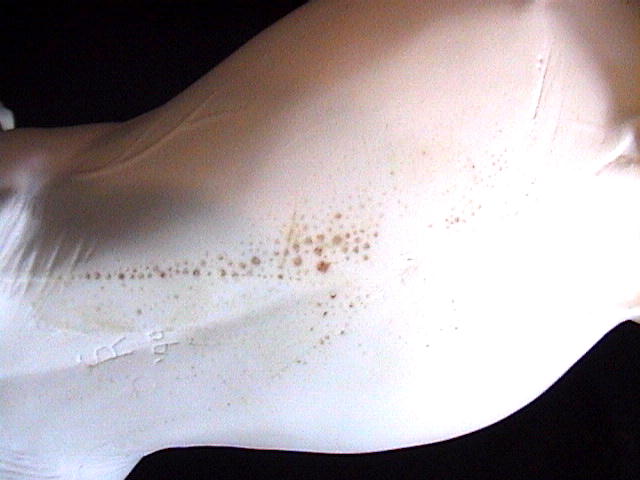
Dapples are more like a jigsaw puzzle than connect-the-dots. They should be irregular in shape, size and placement. Avoid round, evenly sized and evenly spaced dapples. Refer to pictures of the real thing. Dappled grays, dapples in sooty coats, and dapples created from the bloom in a healthy coat will all have differences that the artist should strive to capture. The other pitfall is star dapples that look like perfect stars; keep them irregular instead. On the forearms and gaskins the starbursts actually occur in the skin over veins; keep this in mind when rendering them.

6) Sticky primer

Sticky primer can best be avoided by spraying under the right conditions in light layers on a properly prepared surface. Humidity seems to be a main contributor to the sticky factor, so try to stick to drier days, not too hot and not too cold. Applying the layers too heavily, or not allowing layers to cure (dry) completely between coats can also cause sticky primer that never fully cures.

Another source of trouble is what lies underneath, causing a chemical reaction. Is it a newer plastic model? These can take a long time for the primer to cure. It’s best to start by roughing up the surface lightly with sandpaper and spraying one very fine misting layer that barely coats. Allow to cure completely, and then apply one more very light misting layer to cover a little more. When that is completely cured, you can generally proceed to primer as normal. Was an OF paint job removed with chemicals? Maybe a painted model wasn’t stripped beforehand? Or the stripping agent wasn’t completely washed off? These could be the sources of a chemical reaction.

If you find yourself with sticky primer, just set the model aside and let it sit for a long time in hopes it will cure. If you still have sticky primer months later, your best bet is to strip it and start over. Adding layers of paint, pastel and fixative will not make sticky primer go away.

7) Less than Stellar Markings

Nicely done details will enhance even a simple paint job. On the other hand, careless details will ruin an otherwise gorgeous one. Use multiple thin layers of white to build up to an opaque white marking. This will eliminate brush marks and build up if done right. And don’t stop before that marking is opaque white, there’s no such thing as a transparent white marking on the real thing. You don’t want any body color showing through. And pay attention to the edges where the marking meets the body color. This area should be tidy and your intent clear. Are you mapping the edges with a thin area of wash? Are you doing individual hairs? Maybe several edge techniques on one model? Just be sure to make your intention clear.

8) Hair Going the Wrong Way

If you have markings, make sure you know which way the hair is going! This is true of fleabites, pinto mapping, and appaloosa spots. If your hair pattern doesn’t follow the hair growth direction of the real thing, you’ve just ruined the believability of your work. And isn’t realism the end goal?


Example of appaloosa spots following the direction of hair growth.

9) Lost Detail

If you’ve ever seen a sad little model that has been over-primered, you know what I’m talking about. This can happen quickly to a mini during prepping, but larger models aren’t immune, This occurs when primer is applied too thickly or with an excessive number of layers and the primer runs into the subtle details of the model. Poor little critters – don’t do this to your models! Tamiya brand primer offers a fine white primer that is excellent for retaining details. It was created for metal miniatures, but I have had success with it on mini resins to retain detail. Try googling Tamiya primer to find a supplier.

10) Copying Other’s Work or Ideas

I left this one for last, as I think this is a huge pitfall that strikes a chord for many. A new and upcoming artist can put a blotch on his or her reputation when she copies a model done by another artist. The original artist will likely be offended, as could admirers of that artist’s work. The innocent new artist may not see anything wrong, after all, isn’t imitation the most sincere form of flattery? But I caution strongly – don’t do it. A lot of time, energy, and creativity goes into each piece that an artist creates. Their vision is uniquely their own and trying to reproduce it for yourself, whether for your own enjoyment or for monetary gain just isn’t right. So no matter how much you admire a resin, don’t try to customize your plastic model to match it. And no matter how much you love that custom and want one for yourself, resist the temptation and find your own unique voice in creating models.

November 24, 2010

How To Prep Resin & Plastic Sculptures


Prepping Instructions for Resin and Plastic Sculptures

by Danielle S. Feldman

Prepping a resin model for the first time can be quite intimidating. For me, it took having two of the same model before I would even attempt prepping one! This article is intended to walk you through the process step-by-step. And for those experienced with prepping, these instructions may give you new ideas.

Resin and plastic model sculptures need to be prepped in order to properly prepare them for a paint job. Lack of prepping will show through even the most beautiful finish work, so it is an important step toward creating a quality piece. It will also insure that the paintwork adheres properly to the sculpture, aiding longevity of your creation.

Supplies needed include…

Sandpaper in several grits, I recommend 120, 240, 320, 400, and 600. The higher the number, the finer the sandpaper. Start with a rougher paper and proceed down the numbers to a finer paper as you work. Not all models will need the courser papers, I reserve those for removing large areas of epoxy, major flashing (resin or plastic excess along seams), or other hard jobs.

On the average horse I start with 320 sandpaper on the rougher spots and proceed to 400 for smoothing. The 600 paper I usually use only to remove imperfections after the model is in primer, as the 400 grit can leave tooth marks.

I tear off small squares of sandpaper at a time and fold it over so that my fingers are on the back side pinching it together, then I rub the sandpaper that is exposed in a circular motion to avoid scratch marks. When that part of the sandpaper gets gummed up, fold over a different portion of it and use the fresh part to sand. I find this saves my poor fingers from getting raw.

Wet or dry sanding is a matter of preference in my opinion. I only dry sand as I like to get comfortable on the couch for a sanding session. Be sure to wear your mask and don’t worry, your Significant Other/Roommate/Friends will get used to seeing you in it!

Carbide Scrapers available from http://riorondo.com. I’ve gotten to the point that I can’t prep without them. If you are serious about prepping your own models for painting, I recommend investing in the set. If you can’t purchase the entire set, they offer the availability to buy the handle and the rounded tip as a package. This is the tip I use the most and is well worth the investment.

Liquitex Medium Viscosity Modeling Paste is the perfect filler for gouges, pinholes, and misaligned seams. It is white, so you don’t waste extra layers of primer to cover up red spot putty. Keep the jar covered up while you work as it will dry quickly. When kept fresh, a small bottle lasts for a long time, making up for the cost. Look in your art supply section for this product.

Use moisture, on your fingertip or brush, to smooth modeling paste when wet and a fine grade sandpaper, 320 or 400, to finish off when dry. Bondo Spot Putty is a suitable alternative, but it’s red, which drives me nuts. Another medium for filling pinholes that I have not yet tried is IBD Brush on Resin Gel.

Baking Soda and Super Glue (not the gel variety) are another source of filler for repairing raised areas (ear tips, nostril rims, tail and mane tips) and large depressed areas. Apply a bead of glue to the area and drop a pinch of soda on it. It will harden instantly to white. Continue the same process drop by drop until you have the shape roughly that you want. Or the inverse also works, fill a small hole with baking soda and drop glue into it. Build up large areas slowly. A dremel or jeweler’s files can be used to sand down the area, followed by sandpaper to refine it smooth. This is a stronger repair solution for larger areas or raised areas than modeling paste. But it is harder to sand, so I don’t prefer it for air holes, seam depressions, etc.

Gapaxio (Martin Carbone Epoxy) or Apoxie Sculpt are another medium for rebuilding missing ear tips, mane and tail tips, larger depressions and filling in repairs. Also used for major resculpting and customizing, it is a must have on the shelf of every customizer. It sands easier than soda glue, but may not be as durable when applied in layers. If you are going to do any resculpting to the piece, this needs to be done prior to the primer application.

Rubbing Alcohol for smoothing out the epoxy edges. Also use with a soft brush when you are finished shaping to remove epoxy beads and for final smoothing. Too much rubbing alcohol will cause the epoxy to pull up from the plastic or resin, so use it sparingly.

Rustoleum White Sandable Primer is my preferred choice. I always use white as I start applying pastel directly on top of the primer. Other brands work great, another choice is Krylon for resins, but not plastics. You may find certain primers work better in your area than others due to humidity and other factors. It is best to use primer on dry, warm, windless days. Of course, this isn’t always practical, so use your best judgment.

If you shake your primer thoroughly (up to 5 minutes or more) before applying, you are less likely to get primer that will not cure (or spatter or crackle). And always allow your models to dry outside, if possible (keep in mind drying temperatures should be warm, not too cold or hot). I have shelving set up in my garage and in my basement covered in aluminum foil for models to dry on. The out gassing is terrible on primer and matte sprays. And always spray outside. Never, never spray inside. Do not fool yourself into taking a short cut on primer and spray use, your health is not worth risking.

Always wait overnight for primer to cure completely before sanding or moving on to painting. If you find your primer just won’t dry after several days, it will need to be stripped and reapplied. I recommend Easy Off Oven Cleaner for stripping primer and paint.

Mask to protect yourself from breathing the resin and plastic dust created when sanding.

Disposable gloves to protect your hands from primer.

Jeweler’s files are good for filing down metal support rods if they are protruding out of the resin.

Emery boards are great for leveling out the bottoms of hooves on tipsy models or club footed models that need shaping.

Comet cleaner, or similar scouring product, and a scrubbing sponge and old toothbrushes are the perfect way to wash off the residual mold release on your resin model.

Dremel Mototool with various heads. Most prepping does not require one, but all major customization will. Ideal for plastic carving of details like nostrils, ears, and hooves. It is also handy for the major shaping of soda glue repairs.

Now to get started…

Washing the model is the first step for me, otherwise I forget to do it! Other artists like to wash theirs after sanding to also remove dust. I wipe dust away with a cloth. Whenever you decide to do it, I recommend doing it before you use fillers (modeling paste or spot potty) as the scouring may remove it or cause deep scratches in it causing you to refill that area.

Sprinkle some Comet directly on the model, add water to create a paste, and scrub, scrub, scrub with your sponge and old toothbrushes. Get in all the nooks and crannies, under tails, between legs, in nostrils and ears, as these areas are likely to have residue from casting left over. The reason for washing is that this residue may prevent the primer from properly adhering to the resin sculpture. I skip this step on plastic models. And as an aside, I do not strip paint from original finish plastics either. Be sure to rinse the model thoroughly so no Comet remains and set aside to dry on a towel. Or go ahead and sand during this phase if you prefer to wet sand. Just use caution in sinks that fragile ears, tails, and legs do not get bumped! And keep a firm grip so you don’t drop a wet model.

Repair work is sometimes needed as part of the preparation process. Use soda glue or epoxy to repair broken ear tips and similar areas. Some artists will even use soda glue for filling pinholes and large depressions. Also look for mane and tail tips that are broken or have air holes on the tips at this time. Be sure to sand the areas around repairs so they blend into the model. More heavy repairs, like legs, and major resculpting are out of the scope of this article.

I will add here filing down metal wires that protrude from the sculpture. I use my jeweler’s files to sand them down as flush as I can get with the model, followed by filler to smooth the area and sanding. Sometimes though, just a little filler alongside the wire will be enough to fix it, especially on pasterns.

Also want to mention leveling of hooves on tipsy models. Set the model on a flat surface to determine which hoof is too long. Then hold an emery board parallel to the bottom of the hoof and sand it down until the model stands properly.

Seam removal follows. I use the flat side of my Carbide Scraper bit for running along seams (use rolled up or folded sandpaper if you do not have scrapers). Aim for scraping the seam flush with the body of the model. I start on the head, following each seam until it meets another seam, so as not to overlook any. There is generally a seam around the edges of each ear, in between the ears, and from the forehead straight down over the muzzle to the underside where it meets the neck. It continues down the neck, where there is a seam across the chest and down and up each leg, across one or both sides of the barrel, between the hind legs, up and down both back legs. Then under the tail to the tip, and over the top of the tail, across the back and up the crest/mane. Pshew!

To be on the safe side, I usually follow the seams again with 320 grit sandpaper to remove any etch marks from the scraper and any bits of seam that weren’t removed. If there are depressions along the seams, make a mental note, or pencil mark, of them as they will need to be filled in the next step.

Wrinkles, veins, and hair textures of the mane and tail and any feathers present a special challenge for seam removal. I use the pointed Carbide tip to scrape the seams from between wrinkles and hair grooves, trying to keep the original sculptural shape intact and removing only the excess flashing. Folded up fine sandpaper can also work parallel to the groove. Veins require special care as careless sanding can obliterate them completely! Go slowly and use fine sandpaper around that area. If you sand off a vein, careful application of modeling paste with a paintbrush can recreate veins.

For plastic models, now is a great time to do any additional nostril, ear, and hoof carving with a dremel and/or carbide scrapers. I sometimes use the round, tapered Carbide tip to gouge out hoof bottoms and hair like textures in manes and tails.

Filling depressions, pinholes, gouges, and the like is one of the more tedious portions of prepping I find, but one of the most important. Take your modeling paste or spot putty and apply a small portion into the depressed area. Use a little moisture on your finger or brush to remove the excess in an effort to smooth the area. This will save you sanding time after it dries. I used to goop it on and then spend forever sanding it back down before I discovered this time saving trick. I try to fill all areas at once in one sitting. It dries fairly quickly, so the first model will be dry and ready for sanding by the time I apply filler to a second model. I use 320 and 400 grit paper to smooth the filler. Use the sandpaper in a circular motion to help avoid scratch marks.

On plastic models, it is common to fill in the mold maker’s mark. However, I feel strongly that resin pieces should not have the artist’s mark/signature filled in. Resin castings are usually done in smaller runs, which qualifies them for protection under certain copyright laws. If nothing else, I think it is respect to the artist for their creation.

Prime the model with a sandable primer. You will start by shaking the can pf primer for about 5 minutes. The can will generally feel cooler when shaken properly. Don’t rush this as it may spatter, or worse, not mix enough in the can to cure on the model, causing you more work by stripping and starting over. Put on a disposable glove and hold the model by one body part. I like to use the tail first if I know it is reinforced with wire. Necks and legs work also. Go outside and hold the model away from you. Start the spray away from the model to avoid any initial spattering. Then apply a light, misting coat to the areas you’re not holding keeping even pressure on the nozzle. Don’t stop and start the primer while pointed at the model. Keep the spray going and move the model around with your other hand to cover all exposed areas. Don’t go right up against your glove either or you will create a line that will have to be sanded off. The first light coat will dry quickly, so apply a second light coat when it appears the first has dried, then set aside to dry. Come back later and when the model is dry to the touch, pick it up and spray the opposite end in the same fashion.

Do not apply primer too heavily as it may run, as well as fill in detail on the model. The exception to this is if there is a rough area on the model that would be more time consuming to sand out. Sometimes a little thicker primer will fill irregularities well. Use caution though and avoid losing details in other areas. Thicker primer will also take longer to dry, as much as days more.

Set the model aside to dry overnight before further sanding or painting. Subsequent coats will be added as you further inspect the model.

Checking your work is a crucial step. After the initial application of primer, bring the model under a bright light or in front of a window on a sunny day. You want to hold the model up and examine it entirely. You will be surprised at how many imperfections you missed the first time around. The primer gives it an even finish and the lighting will cast shadows on any imperfections. At this point, you may need to repeat any or all of the above steps (minus washing and repairs, of course). If you find that the sandpaper is gouging the primer, then it is not fully dry. Set it aside to finish curing. And keep checking your work after every priming session until the prep job is without blemish.

For additional tricks, tips, and to see it done

I recommend a copy of my instructional DVD, The Art of Prepping. At $25 plus shipping, you'll be saving money after your first prep job!

October 10, 2010

Top Ten Not-so-obvious Must-have Very-affordable Tools for the Artist

Top Ten Not-so-obvious, Must-have, Very-affordable Tools for the Artist

By Danielle S. Feldman

I’m a firm believer that no matter whether you’re building a bookcase or creating fine art, you will have a better end product if you start with the right tools. The following is a collection of ten somewhat eclectic and mostly not-so-obvious tools

and supplies that I find essential in my own creation endeavo

rs. I hope that one or two will strike a chord for you and bring your creation making to a new level of satisfaction. And the best part is they’re all affordable.

Here are the supplies mentioned in this article (minus the wire hanger). Hope they work for you!

1. Rubbing Alcohol

This tops off our list as it has two purposes. First, it acts as a smoothing agent for epoxy. Use this instead of water when smoothing out epoxy over a surface and to feather the edge where the epoxy meets the original surface of the model. Be careful not to over saturate the epoxy as it will lose the ability to hold detail and may start to crumble off as it loses the ability to adhere to the original surface. This is especially true of smaller areas, like ears, where you need the epoxy to have the strongest bond possible. The second use for it is with plastic. When used carefully, it will react with the plastic to smooth out, or even out, a rough spot. One example where this might be useful is the side of a hoof, where sanding with an emery board (see #2) has roughened it up and you want to get a smoother surface. You can use a Q Tip to apply a fair amount of rubbing alcohol to just that area. I would recommend rinsing the area with water afterwards to remove any residual alcohol before applying primer.

Where I got mine: the local grocery store in the pharmaceutical department

Cost: $1.59 for the tall bottle, $.87 for the short one

2. Emery Boards

Nothing beats an emery board for shaping hooves. So many plastic models have rounded toes and this just shouldn’t be so! Whether you add epoxy or just reshape the hoof will depend on the model in question, but either way, an emery board is ideal for recreating the proper shape of the hoof. Hold it at the same angle of the hoof wall or matching the plane underneath as if the horse were standing. I would advise using pictures of hooves as reference to yield the most accurate results.

Where I got mine: the local grocery store in the cosmetics department

Cost: $.89 for a pack of 15 count

3. Jeweler’s Visor

The first time I saw this useful tool was at a pastel workshop where a handful of students were wearing them. They look a little like safety goggles, but the lenses are magnified! They even have the ability to change the level of magnification via a little lens that can be flipped down. They can fit over regular glasses as needed and essentially allow you to magnify your work so that you can see details and tiny areas so much better. Who couldn’t use these? I caution not to do an entire model wearing these as you’ll want to step back and see the entire picture from time to time.

Where I got mine: EBay under a search for “jeweler’s visor”

Cost: around $12 with shipping

4. Super Glue & Baking Soda

This idea may not be new to you, but bears mentioning among this group of eclectic items. Regular super glue, not the gel variety, mixed with a bit of baking soda yields a strong substance that generally bonds well with resin and is sandable. Sarah Rose wrote a great article on restoring ear tips using this substance, that can be found on her website at http://rosehorse.com, as well as in RESS’ Technique Booklet 2. It can be dremeled, but do so in a well-ventilated area as it outgases terribly. It can also be used to fill small holes and air bubbles when prepping.

Where I got mine: The local grocery store: Super glue in the hardware dept and baking soda in the baking isle

Cost: Super glue is $2.99 for a pack of 4 single use tubes, which I like since mine always dry out before I get back to using the tube again. Baking soda only $.37

5. Dental Tools

Whether sculpting in a permanent medium, like epoxy, or in a workable medium, like non-hardening clay, a variety of tools are essential. One fairly affordable source of tools with an assortment of tips is dental tools. In addition to picks of different shapes and sizes, you can also find a wide assortment of spatula-type carving instruments. These were created for working with dental wax molds, so why not equine wax, clay or epoxy molds? Grab an assortment and play around with them to discover the different textures and shapes you can create with them.

Where I got mine: EBay by searching for “dental tool”

Cost: Approximately $10 with shipping for a set of 7 new stainless steel tools

6. Airbrush Needle

Now this one may seem like a normal artist’s item, but the way I use it, not so much. I took an already bent (and useless) airbrush needle, bent it into a smooth little hook and use the outside curve to sculpt with. I use this to create hair texture more than anything. It is ideal for creating braids in the mane and tail to keep them tidy and defined.

Where I got mine: Any local or online art store that carries airbrush accessories, http://Dixieart.com is a great site

Cost: $2.99 new

7. Kneaded Eraser

An often forgotten little artist’s tool, is the kneaded eraser. If you ever work with pastels or other dry medium, you’ll find this to be a must-have for cleaning up mistakes and for rendering techniques. I often use mine to remove pastel in dapple-like fashion to reveal the color layer underneath a recent (but not yet sealed) application of pastel dust. It’s also a lifesaver for cleaning up the neck when using pastels to color a mane. Form the eraser into a point and remove the pastel on the neck along the end of the mane.

Where I got mine: The art department of the local hobby store or art supply stores

Cost: $.99

8. Wire Hangers (and Floral Wire)

Here’s another two-purpose item. First, wire hangers serve as great support for broken legs and tails. They are the right diameter for traditional scale legs and are incredibly strong. Find a dremel bit roughly the same size and drill a hole part way into each side of the leg. Use the soda glue technique (see #4) to set the wire in place in both ends and then epoxy the rest of the area, sand smooth and finish as needed.


You can see a piece of coat hanger supporting the part of the mane where it lifts off of the neck.

Wire hangers can also serve as armature wire: whether inserted into a neck to help support flying manes (again, set with soda glue, see #4), inserted into the dock to create a new tail, or to act as the basic form when creating a sculpture from scratch. You’ll want to wrap floral wire around the hanger wire to give your epoxy or clay something to grab on to. Just keep spiraling the floral wire snugly around it until the entire length of the hanger wire is covered.

Where I got mine: The dry cleaner and the florist section of the local hobby store

Cost: Floral wire at $1.99 for 30 gauge, ¼ lb. on a paddle

9. Micro Brush Applicators

These are great for the pastel artist when you just can’t find a Q Tip small enough! There are different brands, different sizes, and different purposes of micro brush applicators. And for the equine artist, they are indispensable. I’m sure there are uses for them with wet mediums, as well as dry. The applicator is essentially a tiny, fuzzy tip on a hand-held, plastic stick. And I just can’t say enough about them!

Where I got mine: Online dental supply company, http://idsdental.stores.yahoo.net/index.html

Cost: 100 count for $5.99 (search for magic brush)

10. Beads or Faux Pearls

Now for this neat little tidbit, I give credit to Gwen Reardon, popular bronze equine artist. In her week-long sculpting clinic, she introduced the use of a bead or faux pearl to use as an eyeball when sculpting. Because it’s hard, sculpting the bony structures and fleshy nuances around the eye are much easier. A clay eyeball just gets squished in the process, but a bead will allow for manipulation of the surrounding area. Just find a bead the approximate size of the eyeball in scale to your sculpture.

Where I got mine: Jewelry making section of the local hobby store

Cost: $1.99 for package of 80 count