 |
Kermit
|
National Model Painting Month is a great event hosted by Jennifer Buxton (thank you, Jennifer!). In the month of February, the challenge is to paint one model horse. But it is so much more. Professionals and beginners come together and share their knowledge, challenges, set-backs, and accomplishments. My facebook feed was filled with people posting about their journey all February long. For me it was educational, inspirational, and motivational. I've set a goal to complete the equivalent of one model a month, so 12 by the end of the year!
Last year, I was working during my busy season and a TA for 2 graduate level classes, so my 2017 NaMoPaiMo horse didn't get finished. This year, I didn't have great hopes that I would finish either, as I knew work was going to be even more involved. Which is true, I worked 60-80 hours a week in February. My family was very supportive in letting me pursue a creative outlet during those hours I was home and not working. I think I did laundry once and that was about it (thank you, fam!). I didn't take as many in progress photos along the road as I might have liked, but I managed to snap a few so that I could share my journey with you.
 |
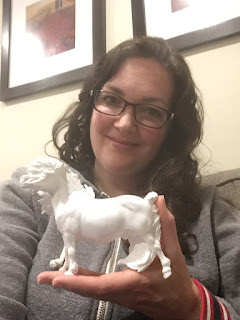
| NaMoPaiMo selfie |
I decided to challenge myself by doing a color I had never painted before, a silver dapple. I found a reference photo I loved that was that mushroom shade of silver dapple so common on British Shetlands. After I airbrushed the basecoat, I realized it was all wrong and would not get me the end color I wanted, so I roughed it up with sandpaper, ready to start over.
One of the great tips I took away from NaMoPai this year was to use the Photoshop eyedropper tool to take color samples from the reference photo. This allowed me to pick out the color palette and match my paint to it. What an amazing difference! (Thank you, Lesli Kathman, for posting that tip!)
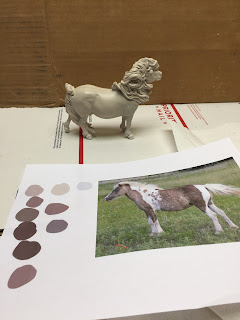
Here's my new basecoat with the reference photo and color palette. I found my printer didn't really show the true colors, so I covered up my computer with a towel and ended up using that instead. The resulting basecoat was much more taupe than the first one.
Here he is doing a compare to the color palette on the monitor. After I airbrush the basecoat, I seal with Krylon matte. That helps to create a good surface for applying pastel pigment.
Another shot of the new basecoat in different lighting. Much better!
I used the same color palette to try to mix a custom blend of color in pastel. There is even some purply color in there, who knew?! Here he is with the first round of pastels, I blocked in dapples using a micro-brush over most of him. Then I sealed with Krylon Matte to lock it in.
Here he is getting his markings and details. I painted him on my lap at this point, so getting a sideways view is pretty accurate.


No comments:
Post a Comment